Agricultural Literacy Curriculum Matrix
Lesson Plan
Cooking Right: The Science of Cooking a Hamburger (Grades 9-12)
Grade Level
Purpose
Through a series of 4 Labs, students will explore the 4 Cs of Food Safety: clean, cook, chill, and combat cross-contamination (separate.) Hamburger is used for the labs, as it is a food that students are familiar with and may be cooking at home. Lab 4 is a review and summary of what the students have learned about the 4 Cs and encourages them to apply these principles to their everyday life. Grades 9-12
Estimated Time
Materials Needed
For the Class
- Dishwashing detergent
- Disinfecting bleach solution (20 ml of liquid household bleach in 1 L of tap water)
- Alcohol wipes or cotton balls and isopropyl alcohol
- Paper towels
- Scale for weighing hamburgers
- Thermal gloves or hot pads for handling the hot skillet
- Safety gloves, safety goggles, and lab aprons for anyone handling and/or cooking meat
Lab 1: (One of each item, per group)
- .5 pound (227 grams) of inexpensive, raw hamburger, such as chuck (4 patties, approximately 50 grams each — do not use pre-molded hamburgers)
- Metric ruler
- Hot plate and a regular skillet
- Non-stick spray to keep the hamburgers from sticking to the pan during cooking
- 1 digital, instant-read food thermometer (rapid read, thin-probe type is best)
- Sharp knife
- Spatula for removing hamburgers from skillet
- Clean paper plates for cooked hamburger
- 5 sterile Petri dishes with nutrient agar and covers
- Parafilm to seal dishes
- Sterile cotton swabs
- Permanent marker
Advance Preparation
- Purchase hamburger.
- Prepare 5 sterile Petri dishes containing nutrient agar.
- Familiarize yourself with the proper use of a food thermometer.
- Review Background Agricultural Connections
- Make one copy of the Student Lab Sheet: Cooking Right for each student (optional).
- Prepare 1 hamburger patty (approximately 50 grams) to cook as students enter the classroom.
Lab 2: (One of each item, per group)
- .5 pound (227 grams) package of inexpensive, raw hamburger meat
- Knife for cutting hamburger package
- 2 plates to place the hamburger on
- 2 self-sealing plastic bags
- 3 sterile Petri dishes with nutrient agar and covers
- Parafilm to seal Petri dishes
- Paper towels
- Safety gloves and lab aprons for anyone handling hamburger
- Sterile cotton swabs
Advance Preparation
- Purchase hamburger.
- Disinfect the knife.
- Divide the hamburger package in half by cutting through the package, including the meat and the bottom of the Styrofoam™ tray.
- Put each half in a self-sealing bag and seal.
- Label one bag “chilled” and refrigerate immediately.
- Label the other bag “room temperature” and leave it out at room temperature at least overnight.
- Be sure to put the packages on plates or in a bowl to prevent raw meat juices from leaking onto other food items in the refrigerator or onto the counter.
Lab 3: (One of each item, per group)
- .25 pound (113 grams) of raw hamburger. It’s best if your local supermarket meat department would prepackage the meat in .25 pound packages to prevent any cross-contamination when dividing up larger packages of meat.
- Sharp knife to open hamburger packages
- 3 individually packaged slices of cheese
- 2 cutting boards
- 5 pre-poured, sterile Petri dishes with nutrient agar and covers
- 5 sterile swabs
- Safety gloves and lab aprons for anyone handling hamburger
- Sterile water to moisten swabs
- Parafilm to seal dishes
- Student Lab Sheet: Don’t Cross Me
Lab 4:
-
Dr. X and the Quest for Food Safety video, Module 4 — Retail and Home
Vocabulary
food safety: the practice of handling, preparing, and storing food in a way that prevents food-borne illness
Did You Know?
- Research done by the U.S. Department of Agriculture shows that 1 out of every 4 hamburgers turns brown in the middle before it is safely cooked. Some ground beef patties look done at internal temperatures as low as 135° F (57° C).
- Less than half the U.S. population owns a food thermometer … and only 3% use a thermometer when cooking foods such as hamburgers at home.
Background Agricultural Connections
 Hamburgers are a staple in the diet of many teenagers. Knowing how to cook them to a safe internal temperature is important to prevent foodborne illness. Cross-contamination is a common problem when preparing food at home. These labs highlight the importance of cooking to the right temperature, chilling, combating cross-contamination, and cleaning surfaces and hands.
It’s particularly important to cook ground meats such as hamburger thoroughly, because there’s a greater chance for bacterial contamination with ground meat than with whole cuts. The bacteria start out on the outside of the meat. When the meat is ground, any bacteria that were originally on the outside can be distributed throughout the hamburger. In addition, when making patties, harmful bacteria from hands, utensils, and surfaces can be transferred to the inside of the hamburger patty. It’s important, therefore, to make sure that the internal temperature of the hamburger has reached a safe internal temperature (160° F [71° C]) to kill foodborne pathogens that may be present.
An “instant-read” dial food thermometer with a probe in the tip is best for checking the proper temperature of hamburgers. The probe should be inserted in the side of the burger, so the entire sensing area (usually 2 to 3 inches [5 to 8 cm]) is positioned into the center of the burger.
It may not always be possible to check the hamburger with a thermometer – for example, when you’re eating in a restaurant. In this case, the safest thing is to ask for the hamburger to be cooked to a temperature of 160° F. Send it back if it’s pink in the middle, although keep in mind that the color of the meat is not an accurate indicator of whether it reached a safe internal temperature.
 Science and our Food Supply
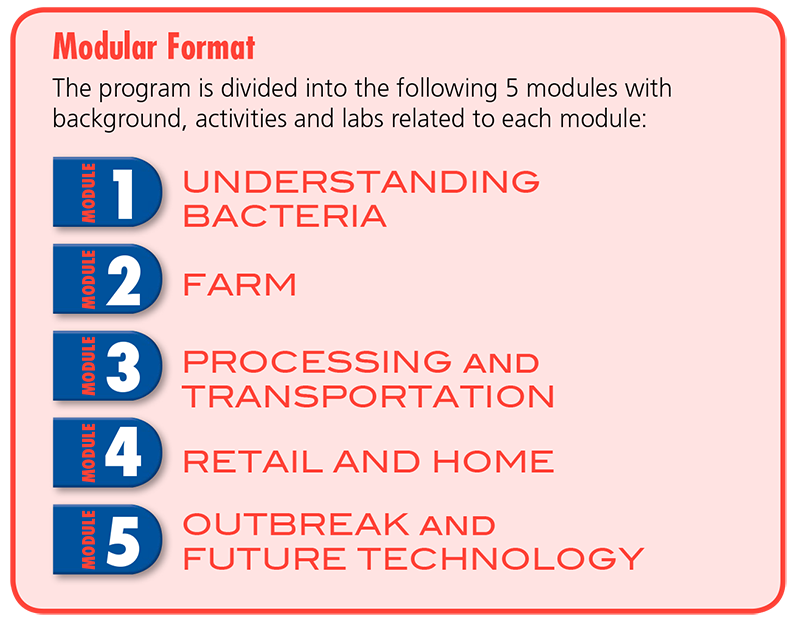
This lesson was developed as a portion of an entire unit of lessons focusing on food safety from farm to table. Use the following links to see the remaining lessons:
Module 1: Bacteria
Module 2: Farm
Module 3: Processing and Transportation
- Blue's the Clue: Souring Milk for Science
- Mystery Juice
- Irradiation Web Quest
- Ultra High Pressure Treatment
Module 4: Retail and Home
- Fast-Food Footwork
- Cooking Right: The Science of Cooking a Hamburger
- Coliform Counts
Module 5: Outbreak and Future Technology
Evaluation: Lose a Million Bacteria (The Game)
Engage
![]()
- Have a hamburger cooking as students walk into the room. Ask students, "How do you want your hamburger cooked — well done, medium, or rare?" Take a tally of the class. Now ask, "Why?" Let them discuss their reasons for about 5 minutes.
- If no one has mentioned cooking thoroughly so that “it’s safe to eat” or “so you won’t get sick,” ask, "How can you be sure that this hamburger will be safe to eat?" List the students’ answers. Then explain, "Today you’re going to use science to help answer that question. What do you think science has to do with cooking a hamburger? Let’s find out!"
- Explain to the students that most hamburger from the supermarket is safe; however, there is a remote possibility that bad bacteria, such as E. coli O157:H7, can find its way into some foods, like hamburger. Because there’s a possibility that E. coli O157:H7 can be in our hamburger, it’s important to cook all ground meat to a safe internal temperature. In this lesson we’re going to explore the amount of bacteria present in raw hamburger and in hamburgers cooked to different temperatures. Let’s see what happens!"
Explore and Explain
Lab 1: The Science of Cooking a Hamburger
Design The Lab
- Divide the class into teams of 3 to 4. Challenge each team to form a hypothesis and design a lab that examines how temperature affects the bacteria in a hamburger.
- Use the following guided inquiry to help the students design well-thought-out labs.
- "What factors should be considered as you design the labs?" (Weight, size, thickness, temperature, consistency, etc.)
- "How can you assure that all burgers are the same size?" (They should be weighed.) Why? (If the hamburgers vary in size, another variable is introduced.)
- "Does thickness matter?" (Yes, burgers should be about .5 inches [1.3 cm] thick. It’s easier to accurately insert the thermometer in a burger of this thickness.)
- "How should you take the temperature?" (Take the temperature in more than one place. Make sure the temperature probe reaches the center of the burger. Take the temperature through the side into the center of the burger. Follow the instructions on the thermometer package.)
- Have teams present their hypotheses and lab designs to the class. Encourage everyone to discuss the merits of each suggested lab. (If students have not included that the recommended temperature for cooking hamburger is 160° F [71° C], challenge them to find out the temperature at which pathogens in ground meat will be killed.)
- Distribute the Student Lab Sheet: Cooking Right. Have the students discuss this design. How is it similar or different to their design? Let each team decide if they want to use this lab design or their group design. Note: At least 2 teams should follow the Cooking Right design.
Conduct The Lab
- Label the Petri dishes:
- control
- raw
- 120° F (49° C)
- 140° F (60° C)
- 160° F (71° C)
- Cook the burgers to 120° F (49° C), 140° F (60° C), and 160° F (71° C).
- Spray the pans with a non-stick spray before cooking the hamburgers.
- Use a food thermometer to measure the internal temperature of the hamburgers.
- Ask students, "Why is it important to take the hamburger out of the pan to measure its temperature?" (The heat from the pan will interfere with getting an accurate temperature reading of the inside of the hamburger.)
- Clean the thermometer with an alcohol wipe each time you take the temperature. Ask students: Why is this necessary? (If there are bacteria in the meat, they might get onto the thermometer and be transferred to the next hamburger you’re cooking.) What is this called? (cross-contamination)
- Note: We’re using alcohol to kill any bacteria and prevent cross-contamination in this lab. However, when you’re cooking at home, you can thoroughly wash the thermometer with soap and hot water between uses.
- Break the hamburger in half and swab the inside of the broken edge when the hamburger has reached the specified temperature. Ask students, "Why do you break hamburger rather than cut it in this scientific test?" (The knife might have bacteria on it and you might transfer the bacteria into the hamburger.)
- Inoculate the appropriate Petri dish after each desired temperature is reached. Make sure students use sterilized swabs and the correct technique (see attached Lab Procedures sheet).
Incubate Petri Dishes
- Seal the dishes with Parafilm (see Lab Procedures sheet).
- Place the Petri dishes in the incubator at 95° F (35° C) for 1 to 2 days or let them sit at room temperature for the appropriate amount of time.
Observe, Record, and Summarize Results
- At the beginning of the next day’s lab, have students observe, record, and graph colony numbers in the 4 samples. Ask students to discuss:
- "Which temperature produced the most effective results in reducing colony numbers?" (The temperature of 160° F [71° C] should show the best results. This is the recommended temperature for safely cooking ground meat. See the “Apply the Heat” chart on page 58 of the Food Safety A to Z Reference Guide.)
- "How did the amount of colonies from the raw hamburger compare to the cooked burgers?" (The raw hamburger will have many more bacteria than any of the cooked burgers.)
- "What did the control dish show?"
Lab 2: A Chilling Investigation
- Use the following scenario as an introduction to the lab, or ask students to come up with a scenario of when meat might be unintentionally left out of the refrigerator for too long.
- Suggested Scenario: Last night, Mrs. Smith bought 2 packages of hamburger that she planned to cook for dinner the next evening. She put one package in the refrigerator. But then the phone rang, and other things occurred that distracted her. She forgot to put the other package of hamburger in the refrigerator. It sat out on the kitchen counter all night long. She woke up the next morning and placed the hamburger in the refrigerator, but wondered if the unrefrigerated hamburger was safe to eat.
- Ask students, "Would you eat the unrefrigerated hamburger? Why or why not? Let’s test both packages of hamburger and see if there’s any difference between them."
Prepare a Hypothesis
- Have the class form a hypothesis about the properly refrigerated hamburger versus the hamburger that was left out at room temperature.
- Now ask, "How would you test your hypothesis?" Record their answers.
- Discuss a good design for this lab.
Conduct the Lab
- Ask for three volunteers.
- Remind students to wear safety gloves, lab aprons, and safety goggles. Note that they should take their sample near the center of the meat and away from the surface where the hamburger was cut. If possible, get a drop of hamburger juice.
- One student will label dish #1 “control.”
- The second will label dish #2 “chilled,” swab the hamburger that was properly chilled, and inoculate dish #2.
- The third will label dish #3 “room temperature,” swab the hamburger that was left out of the refrigerator, and inoculate dish #3.
- Tell the students that one package of hamburger was cut in half to make two packages. Then ask, "Why did we cut the package in half rather than just buying 2 individual packages?" (To ensure that the meat tested is from the same batch, so as not to introduce another variable into the lab)
Incubate Petri Dishes
- Seal the dishes with Parafilm (see attached Lab Procedures sheet).
- Place the Petri dishes in the incubator at 95° F (35° C) or let the dishes sit at room temperature (away from the sun) for 1 to 2 days.
Observe, Record, and Summarize Results (This will be done at the beginning of Lab 3.)
- Have the class discuss the results in relation to their hypothesis. Were there any surprises?
- Ask students:
- "Did the cold kill the bacteria in the refrigerated sample?" (There may be some bacterial growth, since cold doesn’t kill bacteria but keeps the bacteria from growing while the food remains chilled.)
- "What did you observe in the unrefrigerated sample?" (Since the sample had remained in the “Danger Zone” for several hours, more bacteria grew than on the refrigerated sample.)
- "What can you conclude about what went wrong along the Farm-to-Table Continuum in respect to this hamburger?" (The hamburger may have been contaminated with bacteria before Ms. Smith purchased it. However, she compounded the problem by mishandling the meat after she brought it home. She did not follow the “Chill” rule of the 4 Cs of Food Safety — she violated the 2-hour rule by not placing the hamburger in the refrigerator immediately.)
- "Who has the final responsibility for the safety of this burger?" (It’s our responsibility to make sure that food stays safe after we purchase it.)
- Could you just cook the unrefrigerated hamburger thoroughly and make it safe to eat? (No. If food is left unrefrigerated, bacteria cells will grow and more heat is required to kill the additional cells. Meat that is left out too long can accumulate bacterial toxins that may not be destroyed by additional cooking. Also, leaving the meat unrefrigerated invites the possibility of cross-contaminating surfaces, hands, etc. You should practice safe food handling habits and always handle your food defensively. If the hamburger was left out at room temperature for more than 2 hours, it should have been discarded.)
Lab 3: Don't Cross Me
Getting Ready
- Let the students work in teams of 3 or 4. Have each team develop a hypothesis about cross-contamination and cleaning. Then, using cheese and hamburger and any of the other materials on the “Lab Bench,” have them design labs to support their hypotheses.
- Have each team share its hypothesis and lab design with the class. Encourage class members to discuss their procedures and design.
- Distribute Student Lab Sheet: Don’t Cross Me to each team. Have the students analyze this design. How is this similar to or different from your lab designs? Let students decide if they want to use this design or their group design.
- Note: At least 2 groups should follow the Don’t Cross Me procedure.
Conduct the Lab
- Have students conduct their labs using either the Don’t Cross Me lab sheet or their own design.
Observe, Record, and Summarize Results
- At the beginning of Lab 4, have students observe the samples and record the results. Students can prepare data tables to record the results. Ask each team to share their test results and discuss how their results either proved or disproved their hypotheses. How would they change or improve their design?
- Conclude by asking the students:
- "What will happen to the bacteria in the hamburger?" (The burger can be cooked to 160° F [71° C] and the harmful bacteria will be killed.)
- "What will happen to the bacteria on the contaminated cheese?" (The cheese will not be cooked, thus the bacteria will be eaten. The person eating the “contaminated” cheese might get sick.)
Lab 4: Instant Replay
- Show video Module 4 (optional) and discuss the following with students:
- What did Dr. X mean when he said, “. . . food safety depends on more than just technology?” (He meant food safety is also in your hands.)
- What is one of the biggest sources of food contamination in restaurants? (People)
- What did Dr. X say was so critical in keeping our food safe? (Handwashing)
- What did each of the Barkleys do before preparing the food? (Alex washed the cutting board in hot, soapy water before and after food preparation, Mr. Barkley cooked the hamburgers to 160° F [71° C] and used a food thermometer, Olivia chilled the food before serving, and Mrs. Barkley prevented cross-contamination by placing the cooked burgers on a clean platter.)
Elaborate
-
Promoting Food Safety
- Write a brochure on the importance of food safety precautions to be distributed to the school administrators and groups who may be cooking at sports events, school events, fundraisers, etc.
- Talk with the cable access channel in your area about working with them to produce a segment on food safety and using food thermometers.
- Prepare a food safety campaign about using a thermometer when cooking meat, and share it with your local PTSA or other parent organization.
- Test how variations in the thickness of hamburgers can affect the time it takes to reach a safe internal temperature. Cook hamburgers made from the same batch of hamburger the same amount of time. Take the internal temperature. The temperature may vary from hamburger to hamburger. Many people cook hamburgers on a time basis, believing that if one is done, they will all be done. This is not a safe practice.
- Test how to measure the temperature of a hamburger accurately at three different areas on the burger. Take the temperature on the edge versus the center of the burger, and at the thinnest versus the thickest part of the hamburger.
Evaluate
Review the following questions:
- What does the cold chain have to do with the things we’ve learned over the past 3 labs? (We all need to continue the cold chain that started back on the farm in order to keep our food safe. Keep food chilled until it’s ready to be cooked or eaten.)
- What are some ways our food can become contaminated after we purchase it? (List students’ responses.)
- Does what we learned about hamburger apply to other foods as well? What about poultry? Fish? Seafood? Eggs? (The general learnings about cooking, chilling, combating cross-contamination, and cleaning apply to raw poultry, fish, seafood, and eggs as well. For proper cooking temperatures and other information about poultry, fish, seafood, and eggs, see the Food Safety A to Z Reference Guide: the “Apply the Heat” chart (page 58) and the Safe Food Chart (pages 62-69).
- What are some other things we’ve learned in these 3 labs? Here are some probable student responses, but probe for more: Cooking hamburger to 160° F (71° C) is the only way to tell that a burger is safe to eat.
- Temperature should be taken in the center of the hamburger.
- Raw meat should be separated from fresh or ready-to-eat foods to prevent cross-contamination.
- Surfaces used to prepare raw meat must be thoroughly cleaned before preparing other foods on them.
Summarize by concluding that bacteria can spread from kitchen items to hands, and even to food. The spread of bacteria can be controlled through proper cleaning and disinfecting as needed.
Acknowledgements
The Science and Our Food Supply Curriculum was brought to you by the Food and Drug Administration Center for Food Safety and Applied Nutrition and the National Science Teachers Association.
- FDA Education Team Leader Food Safety Initiative: Marjorie L. Davidson
- FDA Science and Our Food Supply Project Director: Louise H. Dickerson
- FDA/NSTA Associate Executive Director and Science and Our Food Supply Program Director: Christina Gorski
- FDA/NSTA Science and Our Food Supply Program Assistant: Jill Heywood
Recommended Companion Resources
Author
Organization
 |
We welcome your feedback! If you have a question about this lesson or would like to report a broken link, please send us an email. If you have used this lesson and are willing to share your experience, we will provide you with a coupon code for 10% off your next purchase at AgClassroomStore. |